Wednesday, November 28, 2012

Baby Shower Autograph book

My good friend recently hosted a baby shower for me.  It was a lot of fun & I really wanted to preserve a fun book of signatures from my guests.  This baby is expected early December 2012 so we planned to have the shower first & then a "meet the baby" tea late in January or early February 2013.  December is rife with holiday busyness, cold & flus and it just made sense to straddle the holiday rather than deal with all it's craziness.

 I found this old card kit in my stash.  It is still cute but quite dated looking, "Paper Magic, you make the Magic" by Sue Dreamer.  I Made a template, & used my Bind-it-all to punch 8 holes in the cards.
 I used some heavy cardboard to make the covers same as how I made the circle smash book.  I covered the covers with glue stick & "Max & Whiskers Basic Grey paper."  The baby nursery & shower theme is baby animals or zoo animals so this fit perfectly.  The covers are 1/8" larger than the card envelope size since I did punch a few envelopes to use as pockets inside the book.  I used the BIA corner rounder to round the outer corners.  Hockey tape sealed the edges of the covers nicely.  Tip:  Use sharp scissors to cut hockey tape, it is very sticky!
 Here is how it looks inside
 All the embellishments were premade as part of the card kit.  I had some making memories fabric tape that I used to cover the preprinted credits on the back of each card.  I used a bit of smash tape to note the date of the event and sticky notes to reserve the first & last pages for notes of the fun shower & tea party details.

I hope this post inspires you to have a look at your stash & think of new ways to enjoy using it.

Sunday, November 25, 2012

Teenage Sleep Shorts

I've been slowly digging my way through my sewing pile.  I had a cheap McCalls patterm that said it is sized for teen or men's small.  Grumble grumble grumble, don't get me started on McCalls pattern sizing!  I got stung, AGAIN!  The silly thing is, I should know better by now since I have been stung by this lesson a few times.  McCalls patterns have always had crazy generous sizing. 

 I sometimes trace a pattern to save the multisize or simplify it.  I tape it onto a window & then tape stretcher paper over it & get busy tracing.  Stretcher paper is a little known secret of quilters that work in health care.  Some doctors clinics or hospitals will give you the end of the roll if you ask.  You can get a whole roll for very cheap from your local hospital.  I can't recall the price now since the roll I have is many years old & it goes a long way.  Remember to mark the cutting lines, grain lines, notches, and dots if you need them.  I was able to trace off the fly & pocket markings since they weren't needed.

 Here is the finished shorts, modeled by my 14 year old son who is as tall as me. 
 As you can see, they are clearly HUGE!  Oh well, they're comfy & he will remember them a long time since they will be in use for a few years I suspect.
I hope I've made you laugh, with this post, I do now but I wasn't so pleased at the time.

Wednesday, November 21, 2012

Heat packs

These are an older project I made but they never let me down.  These are about 8 years old now & just as nice as when I made them.  I used scrap fabric & plain sewing.  There was some covers that have gone missing so that will age them faster using the heat packs au naturale.  They are filled with flax seed, about 1lb each I guess.  They also freeze really well to function as cold packs.  The long one is 5 compartments, finished size 22+3/4" long x 4+3/4" high.  It is perfect for neck or joints.  The rectangular 6 compartment one is 9" x 10+3/4" and is perfect for belly or back ache.  They also work really well to prewarm the bed at night, we all need our toasty comforts. 
I wasn't overly fussy about making them since they were from scrap fabric.  I compartment-ed the flax seeds so they wouldn't become one mishapen lump.  I don't think I even measured the fabric but folded it once the overall shape was sewn to figure out the compartments.  Once I figured out the divisions I did use a measuring cup to evenly distribute the flax seeds & sewed the compartments closed as I filled them.  They lie nice & comfortably where they are placed which I really like.  This is what works for me.  These are well worth an hour of sewing time to make.  Thanks for looking :)

I will be doing a bunch of preposting now so this blog won't be totally abandoned.  As of this writing Nov 19, 2012 there is about 2 weeks to go until my baby is due.   I hope you have great days every day!

Thursday, November 8, 2012

Bassinette Baby Basket Bumper

 Try saying that title 10 times fast!  Here is the sweet jungle animal fabric I found at a Fabricland store.  It is copyright 2010 Precious Moments Designer Collection, Inc.; Licence SPF Fabrics. 
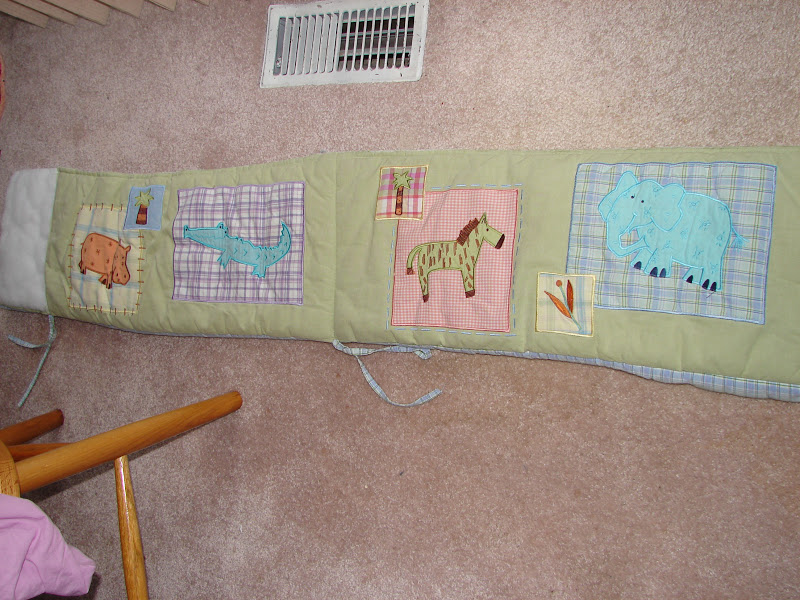
 Here is the remaining crib bumper that I bought at Value Villiage for $4, its a bit worn out & way too big, but by far cheaper than buying new batting & backing fabric.  An hour in the recliner with the seam ripper and I had more than enough supplies.  I washed it twice before commencing & was a little surprised to find the previous owner's detergent perfume still came through.  I guess I forgot the vinegar rinse, since that usually kills perfumed detergents.  The panels are cute & may get re-used into something, but I'm lacking ideas right now.
 Here is the finished basket bumper, it is not tied in this picture.  I forgot to show a picture of the backing fabric, it is white, blue, & green plaid backing fabric from the original bumper.  I also reused the ties & bias fold tape on the top edge.  Why not, it all matched perfectly.  If you click on the pictures to enlarge you will see my sewing is not perfect.  I'll admit it was pinned to death to hold it's shape for sewing & still not easily cooperative.  4 rounds of stitch picking didn't really make this project popular with me.  I added vertical stitch lines at regular intervals to keep the stuffing in place.  I couldn't resist this fabric for this purpose, and for about $20, & a few hours time, it is so worth it.  I won't bother with all the boring measuring & sewing details since this is a project blog & I doubt anyone will have this exact same basket or supplies to duplicate this.  It works out that the bumper is a continuous loop, about 10" tall & about 70" long.  The mat in the base is waterproof & I can use a pillowcase or fold burp-cloth flannels over it.  I have some flannel serged but am not sure if I want to put an elastic edge on them to become custom fitted sheets.
This basket was used by my Mom for me & my brothers, and for my son & 3 other family members.  Over 14 years ago I made a different bumper for my son of fabric with cute cat faces.  I remember he would have the sweetest little mumbling baby conversations with them.  Sorry but I have no digital pictures of that to show.  It is said babies can see 7-15" as newborns, and they are most drawn to look at interesting faces.  I seem to do a mix of practical sewing like this or a binge of pattern sewing.  Thanks for looking at what I've been up to!

Thursday, November 1, 2012

Utility sewing

Some of you know we are expecting a baby very soon.  This means preparations galore of course.  Here is some practical but boring sewing.  I couldn't resist a picture since it looked so pretty spooling from the back of my Janome machine.  Click on the picture to enlarge if you like.
Nursing shields, to prevent icky milk leakage embarrassment
I used 3 metres of prewashed diaper flannel folded into 3 layers.  The glass ramekin was my template and a regular pen to trace.  I started out by cutting around the ramekin with the rotary cutter but it was faster & easier to ditch the ramekin & just go for it.  Once I had them all cut out I had a tower of disks.  I put them to the sewing machine 3 layers each & zig-zagged around the edges for about an hour until they were all done.  I didn't count them because I just don't care that much, honestly, it doesn't matter.  I did this for my firstborn & they are far superior to the store bought paper shields.  They do eventually get everywhere and some go missing.  Once they were done I snipped them apart & trimmed away rough edges.

An interesting side note:  A family member fixed the filters on Mozilla Firefox for me so I no longer need to use Safari to blog.  I had no idea that was why Mozilla Firefox was so hard to blog with when I first started blogging.  I'm not a technological gal so I am really happy to have this simplified.  Apple Safari browser works well, but I have a PC not an Apple so no wonder it was a slower process for me. 

Baby is due Dec 4, we shall see if the "wheel of fortune" dates predictor is accurate or not.

Cheers & have a great day!